

The days are getting shorter and the air is feeling so much colder, but I wanted to send you some more fall vibes before the Thanksgiving holiday.
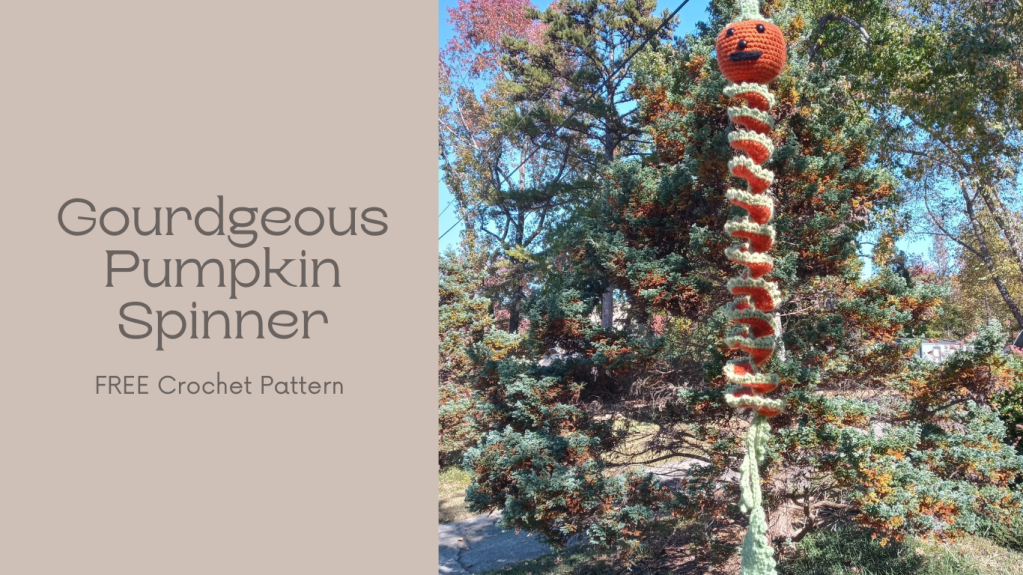
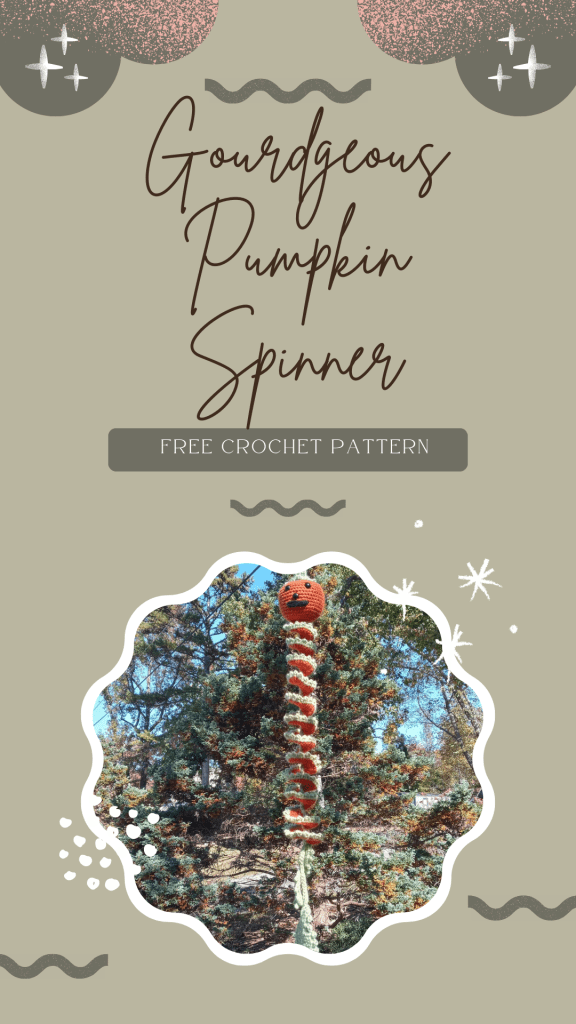
I don’t know about you but I love me some pumpkin pie during the holidays! Shhh, don’t tell the Gourd-geous Pumpkin Spinner about that. Isn’t he just the cutest thing?
Share
The Gourdgeous Pumpkin Spinner features the Spike Double Crochet stitch to make the pumpkins leaves. Both picots and mini picots adorn the lower leaves, giving this spinner a bit of whimsy as it spins around.

Subscribe to OVC Designs!
Get updates on the latest posts and more from OVC Designs straight to your inbox.
You can find the pattern pdf of the Gourd-geous Pumpkin Spinner with a photo tutorial of the Spike Double Crochet in my Ravelry Store.
This pattern is written here using US crochet terms.
This pattern has been tested for errors by a team of crocheters with varying skill ability, this helps to ensure the pattern is free of errors, but should you find any errors or run into difficulties please reach out to me so I can help.
NOTE ON SELLING ITEMS AND COPYRIGHT: The pattern and all images are Copyright Owensvillachick Designs, all rights reserved. You may not copy any part of this pattern or use photos without permission. You may sell finished items (handmade in small quantities by you). Designs credit is apprecieated (tag on social media or link to this post). Thank you.
Skill Level
Advanced Beginner. Uses simple, common stitches and techniques. A photo tutorial of the Spike Double Crochet is included in the pattern pdf.
Recommended Yarn
Any worsted #4 weight yarn.
Yarn Used: I Love This Yarn, approximately 200 yards.
Subscribe to OVC Designs!
Get updates on the latest posts and more from OVC Designs straight to your inbox.
Hooks & Other Materials
US Size 4 mm hook
Scissors
Needle
Sizes/Finished Measurements
Approximately 36″ long.
Abbreviations
Stitches St(s)
Chain (ch)
Single Crochet (sc)
Half Double Crochet (hdc)
Double Crochet (dc)
Treble Crochet (tr)
Foundation single crochet (fsc)
Increase (inc)
Invisible Decrease (inv dec)
Magic Circle (MC)
Slip Stitch (sl st)
Back Loop Only (blo)
Beg (beginning)
Space (sp)
Spike Double Crochet (sdc)
Notes
- Spinner is worked in rows starting at the same end and worked in the same direction for each row.
- Change colors at the beginning of each row if desired.
- Pumpkin worked in continuous rounds
- Stem worked in rows & rounds
- Leaves are worked in continuous spiral
- Ch 1 does not count as a stitch.
- Ch 3 counts as a stitch.
Gauge
Not Necessary. While sizes may vary based on your crochet style, it will not negatively impact the outcome of your spinner.
Special Stitches
Picot: Ch 3, slip stitch into 1st chain.
Mini Picot: Ch 2, slip stitch into 1st chain.
Spike Double Crochet: yo, insert hook from front to back around 1st dc of previous 3 dc block worked, yo draw loop through and up so as not to crush 3 dc block, (yo, draw through 2 loops) twice. [photo tutorial included in pattern pdf]
Subscribe to OVC Designs!
Get updates on the latest posts and more from OVC Designs straight to your inbox.
This pattern is a choose your own adventure style pattern. I made my wind spinner using only two colors but it can be made in one, two or three colors. The wind spinners length can be customized by adding or subtracting your starting chain to make it as short or long as you would like! You can choose to have a face or leave not.
Enchanted Autumn Blog Hop

As part of the Enchanted Autumn Blog Hop hosted by Green Fox Farms Designs, the Gourdgeous Pumpkin Spinner crochet pattern will be free on October 27th.
Don’t have the coupon code?
Simply click on this link to get it before clicking the Download on Ravelry button.

Click this button to get the discounted pattern pdf.
Simply click on ‘Download Pattern Here’ and type in the coupon code at checkout!

All the patterns are also available in a low cost bundle! Click the ‘Bundle Buy It Here’ button to use my affiliate link to get all the patterns!
Subscribe to OVC Designs!
Get updates on the latest posts and more from OVC Designs straight to your inbox.
Pattern Instructions
Wind Spinner
*It is helpful to place a marker at the beginning of the row so you can know where to start each row and differentiate the top from the bottom as you work.
Chain 76, turn.
Alternatively, fsc 75 and skip row 1.
Row 1: using green yarn, sc in 2nd chain from hook and each stitch across. Fasten off. (75 sc)
Row 2: starting at the same place as row 1 started, attach orange yarn with slip stitch, ch 3, dc 1st stitch, 2 dc in each stitch across. Fasten off. (150 dc)
Row 3: starting at the same side as row 2 started, attach orange yarn with slip stitch, ch 3, 2 dc in 1st stitch, 3 dc in each stitch across. Fasten off. (450 dc)
Row 4: starting at the same side as row 3 started, attach green yarn with slip stitch, ch 1, sc same st, *mini picot, sc next 2 sts, repeat from * to end of row. Fasten off. (225 mini picots, 450 sc)
Weave in tails.
Subscribe to OVC Designs!
Get updates on the latest posts and more from OVC Designs straight to your inbox.
Pumpkin
Work pumpkin body in continuous rounds, you will not join at the end of each round.
Rd 1: 6 sc in magic ring (6)
Rd 2: 2 sc in each st around (12)
Rd 3: *Sc, inc next st, * repeat 6 times. (18)
Rd 4: *Sc 2, inc in next st, * repeat 6 times. (24)
Rd 5: *Sc 3, inc next st, * repeat 6 times. (30)
Rd 6: *Sc 4, inc next st, * repeat 6 times. (36)
Rd 7: *Sc 5, inc next st, * repeat 6 times. (42)
Rd 8-15: Sc in each st around. (42)
*Add eyes, nose, and mouth if desired*
Add safety eyes between rounds 14 and 15, 8 stitches apart.
Add safety nose between rounds 11 and 12.
Using embroidery thread, stitch mouth below eyes and nose as desired.
Rd 16: *Sc 5, inv dec, * repeat 6 times. (36)
Rd 17: *Sc 4, inv dec, * repeat 6 times. (30)
Rd 18: *Sc 3, inv dec, * repeat 6 times. (24)
Rd 19: *Sc 2, inv dec, * repeat 6 times. (18)
Begin stuffing with fiberfill and continue as you go.
Rd 20: *Sc, inv dec, * repeat 6 times. (12)
Rd 21: *Inv dec, * repeat 6 times. (6)
Fasten off and close top. Weave in ends.
Using needle and long tail from top of wind spinner, attach pumpkin to top of wind spinner.
Insert the needle into both the top of wind spinner rows and pumpkin, bringing the needle back and forth, continue until the attached securely.
Subscribe to OVC Designs!
Get updates on the latest posts and more from OVC Designs straight to your inbox.
Stem
Row 1: Ch 7, sc blo in 2nd chain from hook and each of the next chs, turn. (6)
Row 2: Ch 1, sc blo in each st across, turn. (6)
Rows 3-7: Repeat row 2. (6)
Ch 1, join rows 1 and 7 and sl st into each st of both rows across.
Turn right side out. Your sl st join will be hidden on the inside of the stem.
Pull your starting tail thru to the top to use for hanging, if desired.
You will now be working in the round along the edges of your previous rows.
Stem Leaves
Rd 1: Ch 1, sc 8 evenly around, join. (8)
Rd 2: Ch 1, inc in each st around, join. (16)
Rd 3: Ch 3 (counts as dc), *dc next st, picot, dc next st, work 1 sdc, skip one st, dc next st; repeat from * around, join to top of ch 3. (12 dc, 4 sdc) [Photo included in paid pdf]
Fasten off and leave a long tail for sewing.
Position stem on top of pumpkin. Insert the needle into both the leaf and pumpkin, bringing the needle back up to the leaf piece. Continue around to secure stem to top of pumpkin. Pull back up through stem for hanging, if desired.
Vine Tail
Join green yarn with slip stitch to bottom of wind spinner.
Ch 25, turn.
Slip stitch in 2nd chain from hook and each ch across.
Join with slip stitch to bottom of wind spinner.
Fasten off and weave ends.
Bottom Leaves
Small Leaf (make 2)
Ch 9, work in spirals as follows:
sl st into 2nd ch from hook, working 1 st into each ch, 1 sc, 1 hdc, 2 dc, 1 hdc, 1 sc, 1 sl st, ch 2, then working 1st into each ch on other side of base chain, 1 sl st, 1 sc, 1 hdc, 2 dc, 1 hdc, 1 sc, 1 sl st, ch 2, 1 sl st into beg of spiral 1 sc, 1 mini picot, (1 sl st next 2, 1 mini picot) 3 times, (1 sl st, ch 3, slip st into 2nd chain from hook, ch 1, 1 sl st) into ch 2 at point of leaf, (1 mini picot, 1 slst next 2 sts) 4 times, 1 sl st into ch 2 sp. Fasten off, leaving long enough tails to attach to vine tail.
Large Leaf (make 1)
Ch 15, work in spirals as follows:
1 sc into 2nd ch from hook, working 1 st into each ch, 1 hdc, 3 dc, 4 tr, 3 dc, 1 hdc and 1 sc, ch 3, then working 1 st into each ch on other side of base chain, 1 sc, 1 hdc, 3 dc, 4 tr, 3 dc, 1 hdc, , ch 3, 1 sc into 1st sc at beg of spiral, 1 sc into next hdc, 1 picot, (1 sc into each of next 2 sts, 1 picot) 6 times, (1 sc, ch 4, sl st into 3rd chain from hook, ch 1, 1 sc) into ch-3 sp at point of leaf, (1 picot, 1 sc into each of next 2 sts) 7 times, sl st into ch-3 sp. Fasten off, leaving long enough tail to attach to vine tail.
Attach to leaves to vine tail at desired locations. Weave ends.
For hanging loop
- Use beginning tails or attach a 12” length of yarn to the top of the wind spinner and tie the ends together.
- Slip stitch join onto a wooden ring or shower curtain ring.
Congratulations, your Gourd-geous Pumpkin Spinner is complete!
I would love to see your projects on Instagram or Facebook by tagging @owensvillachick or using the hashtag #gourdgeouspumpkinspinner #owensvillachickdesigns #ovcdesigns.
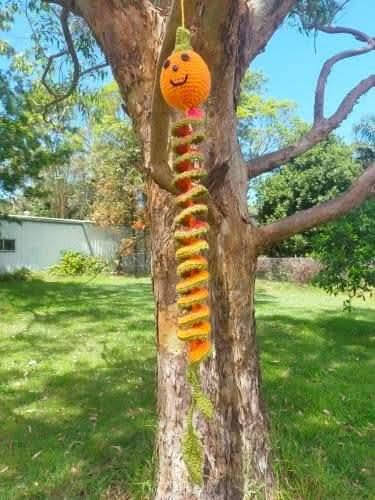
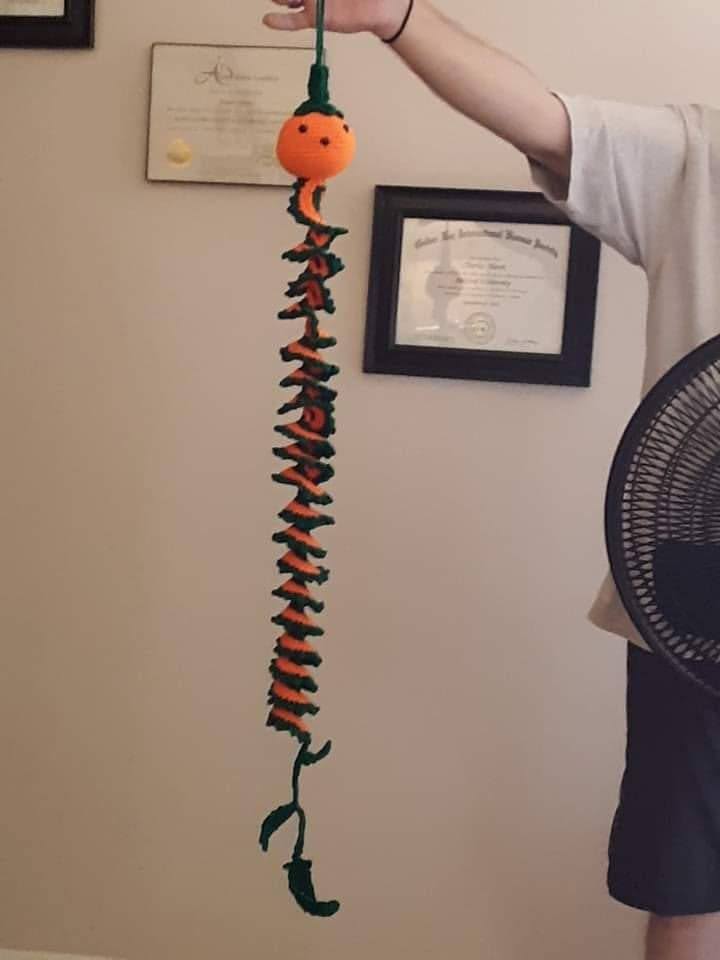
TESTER PHOTOS
A special thank you to my testers for making this pattern amazing!
Check out the awesome wind spinners they created!
Why not check out my other crochet patterns too. I’d love you to have a look around while you’re here.
Please share the link and pin it! And show me if you make it, I’d love to see. Tag me on social media.
Until next time, Happy Crocheting!
ETHY

Subscribe to OVC Designs!
Get updates on the latest posts and more from OVC Designs straight to your inbox.

Leave a comment